Get started with Unicaption and run your first live session
Real-time transcription and translation for interpreters — right in your browser. No install, no hardware. This guide walks you through every step, from signing up to reading captions side by side in two languages.
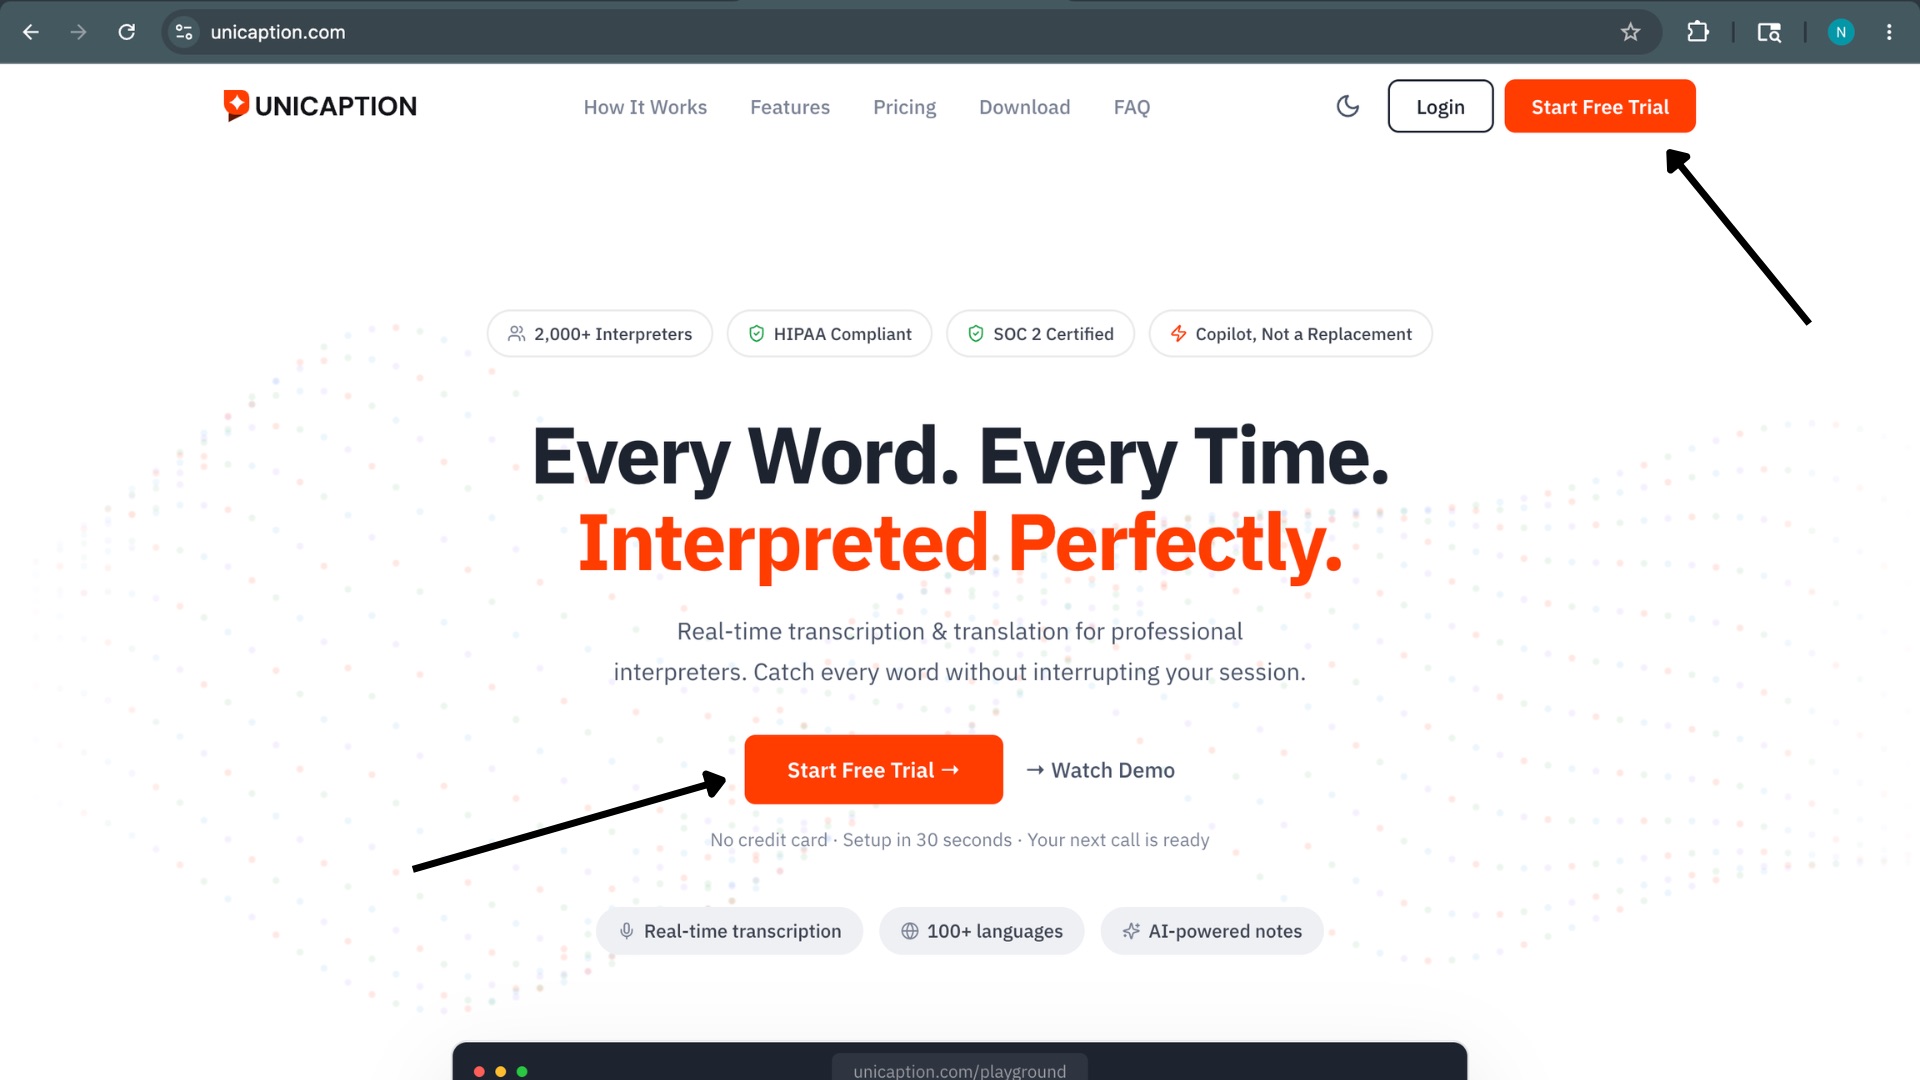
Go to unicaption.com and click either orange Start Free Trial button — one sits in the top-right of the nav, the other in the center of the page. Both lead to the same place.
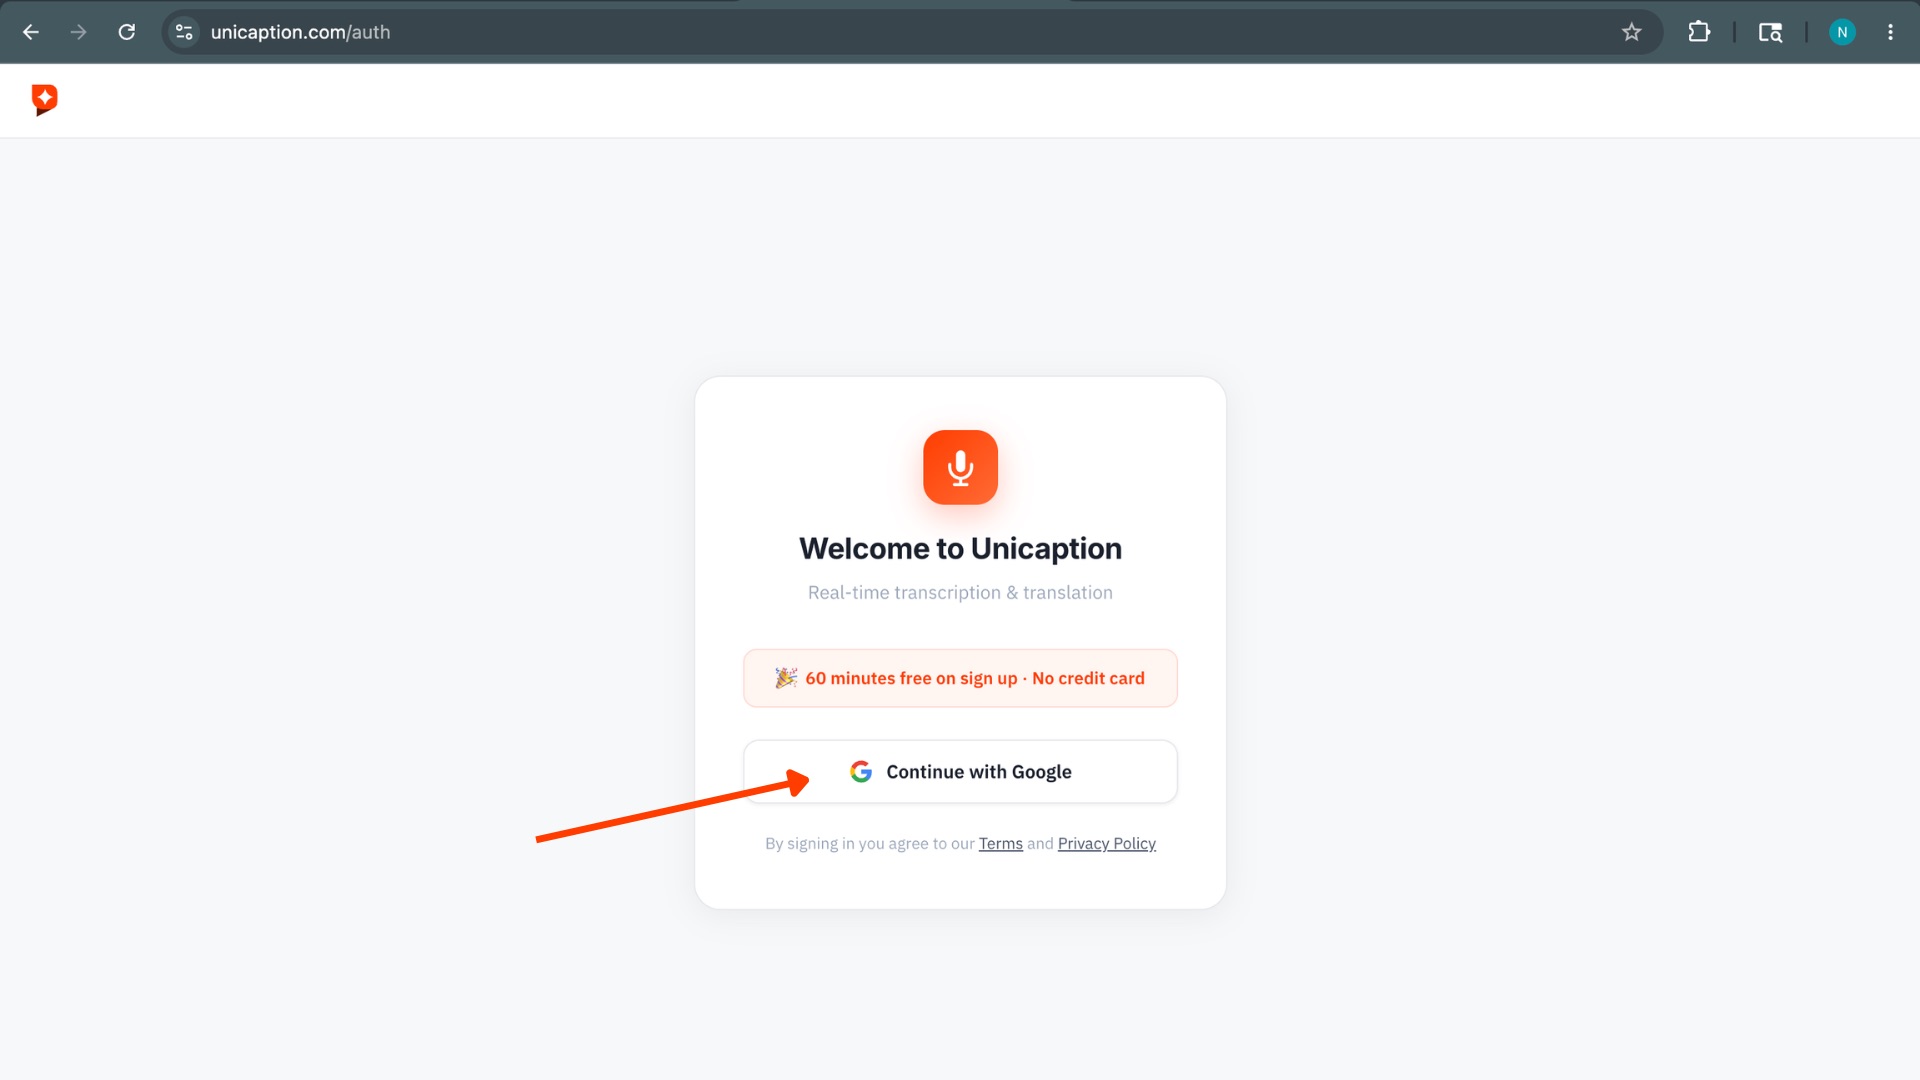
On the welcome screen, click Continue with Google and pick your account. No passwords, no email verification — you land straight in the Playground, Unicaption's main workspace.
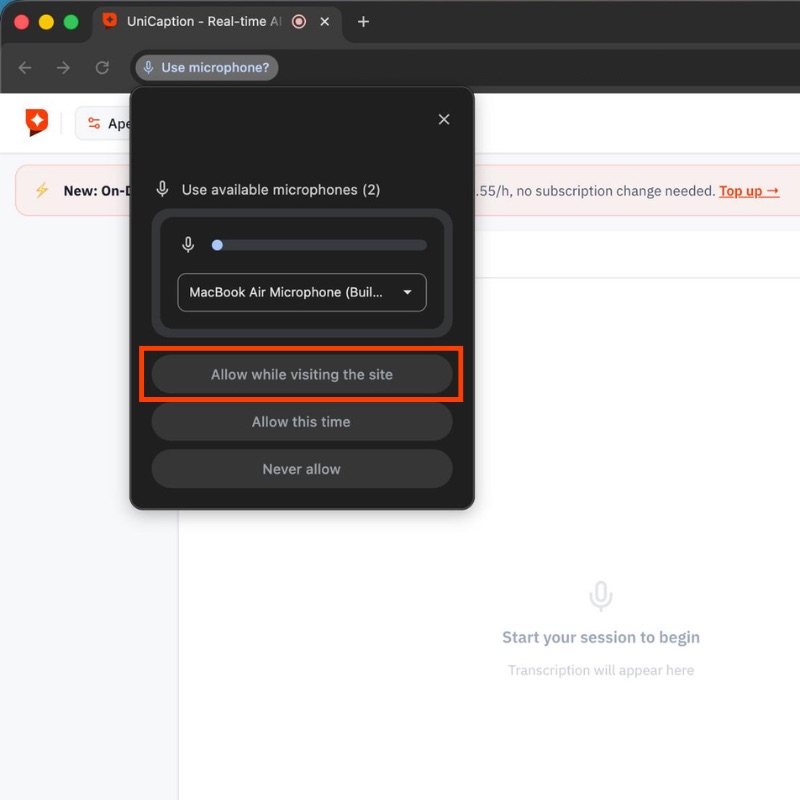
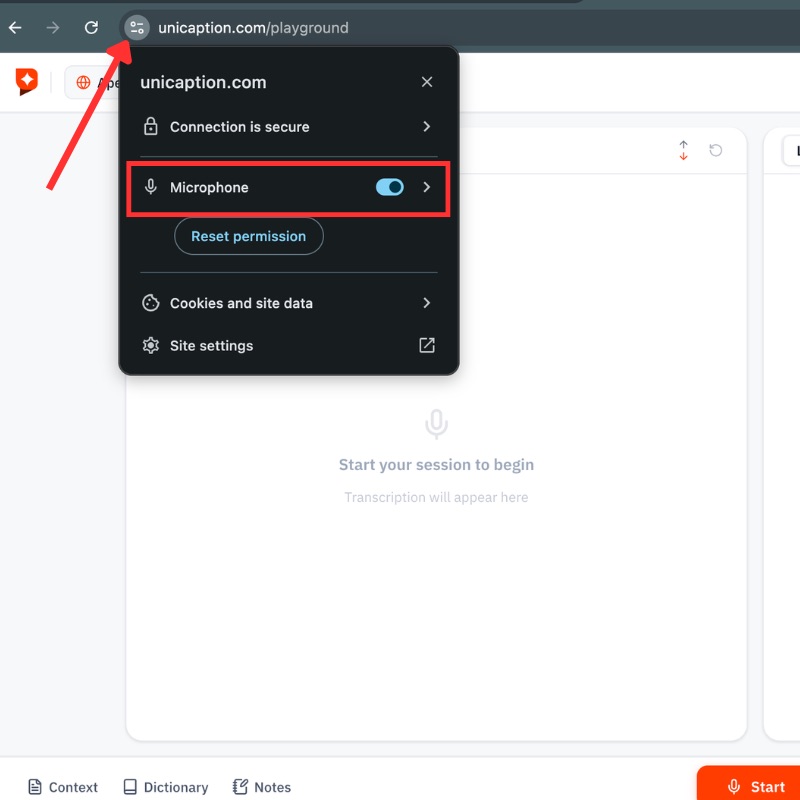
Unicaption needs your microphone to capture speech. Your browser will ask for permission — choose the option that keeps access on, so you are not asked again every visit.
Click your name in the top-right to open the account menu, then pick an Audio Source:
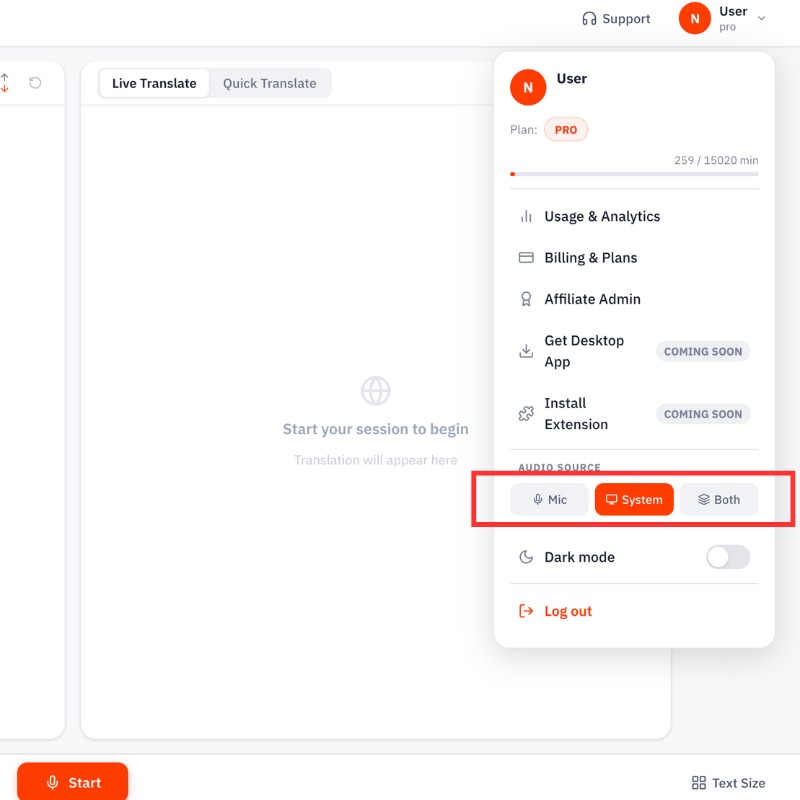
Mic
Captures only your microphone. Best for in-person meetings, court, or conferences where you are in the room.
System
Captures audio playing on your computer — Zoom, Teams, a video. Best for remote calls.
Both
Captures your mic and system audio at once. Use this to transcribe both your voice and the speaker.
Unicaption is multilingual, so before your first session you tell it two things: what languages will be spoken (transcription) and what language you want it translated into. Getting this pair right is what makes captions accurate — and you only set it once.
Transcription takes a primary language plus optional hint languages, so it handles speakers switching between tongues. Translation is the single language the output is rendered in. Set them so they mirror each other:
The same logic works for any languages — French + Arabic, Mandarin + English, and so on. Just make the primary spoken language the transcription primary, and set translation to the language you need to read.
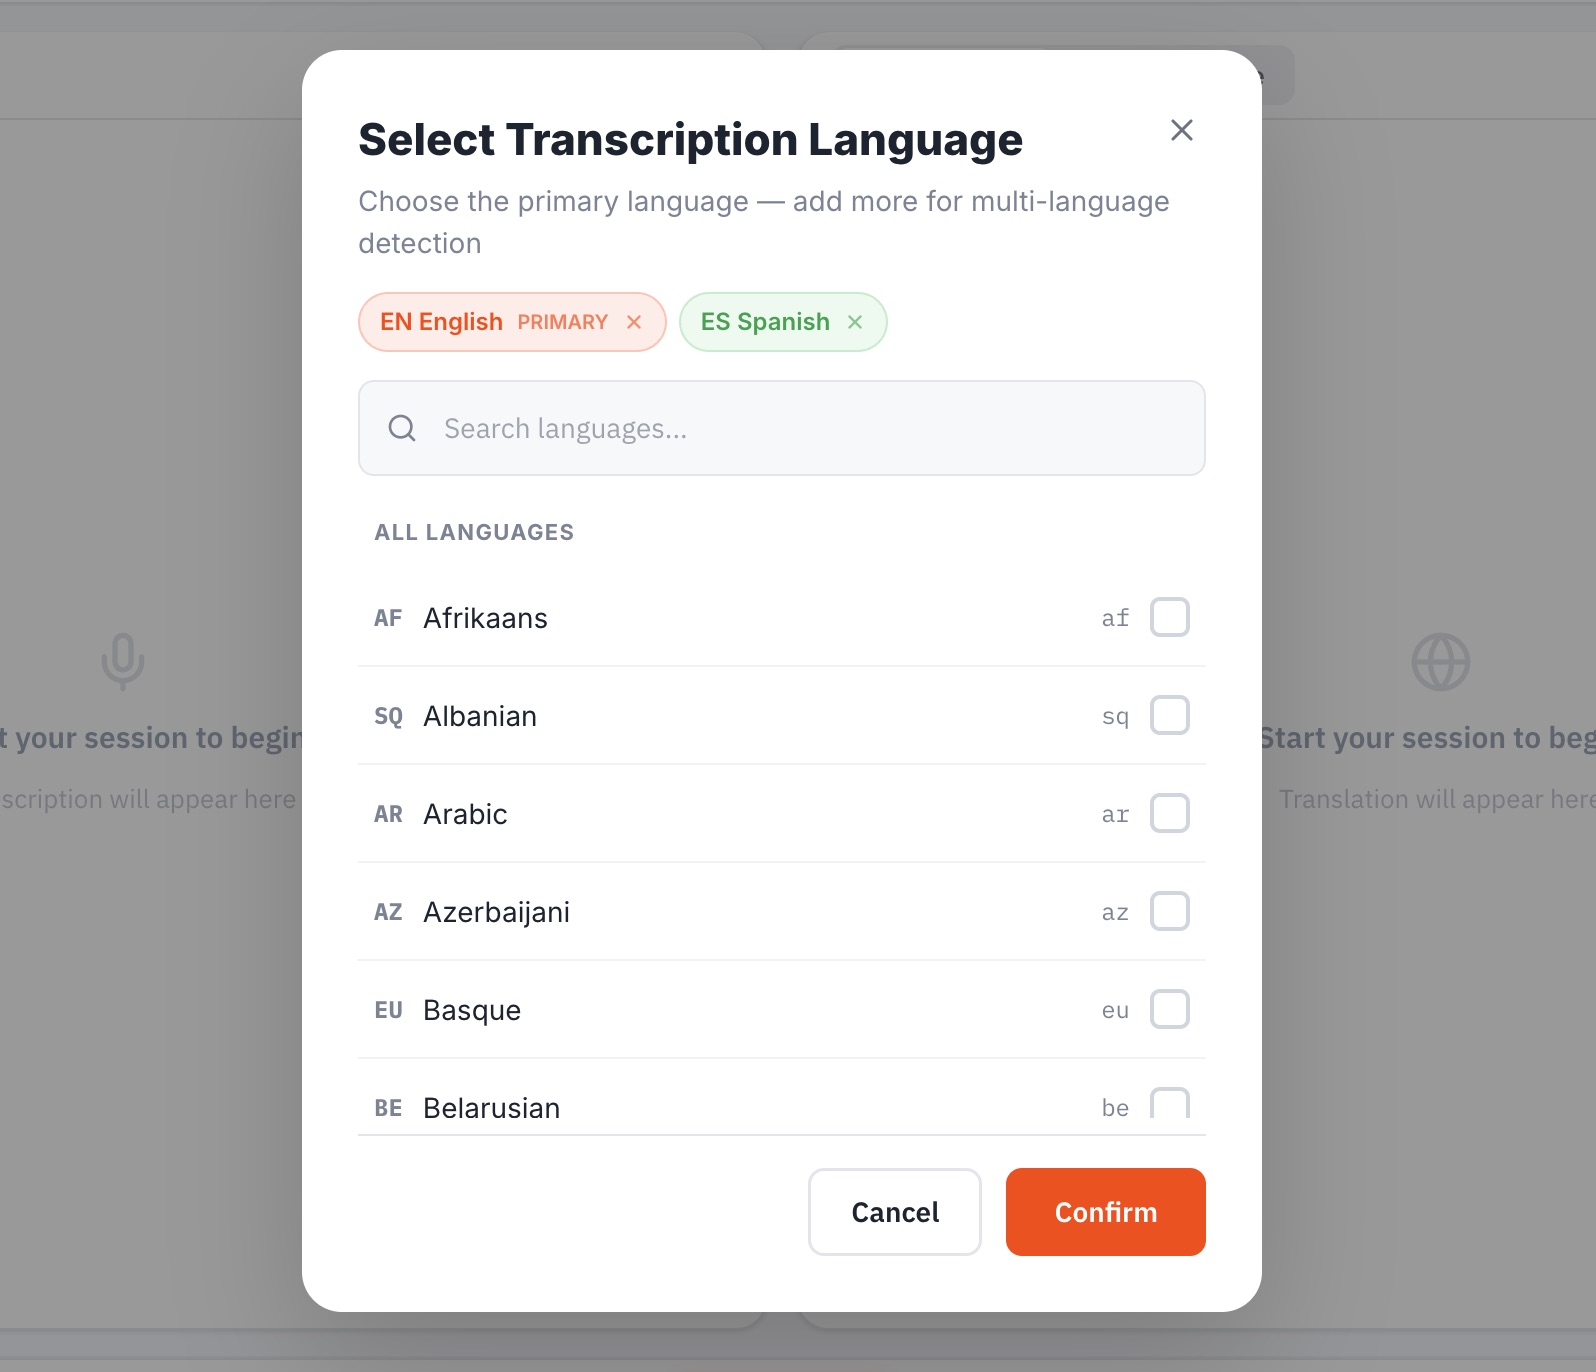
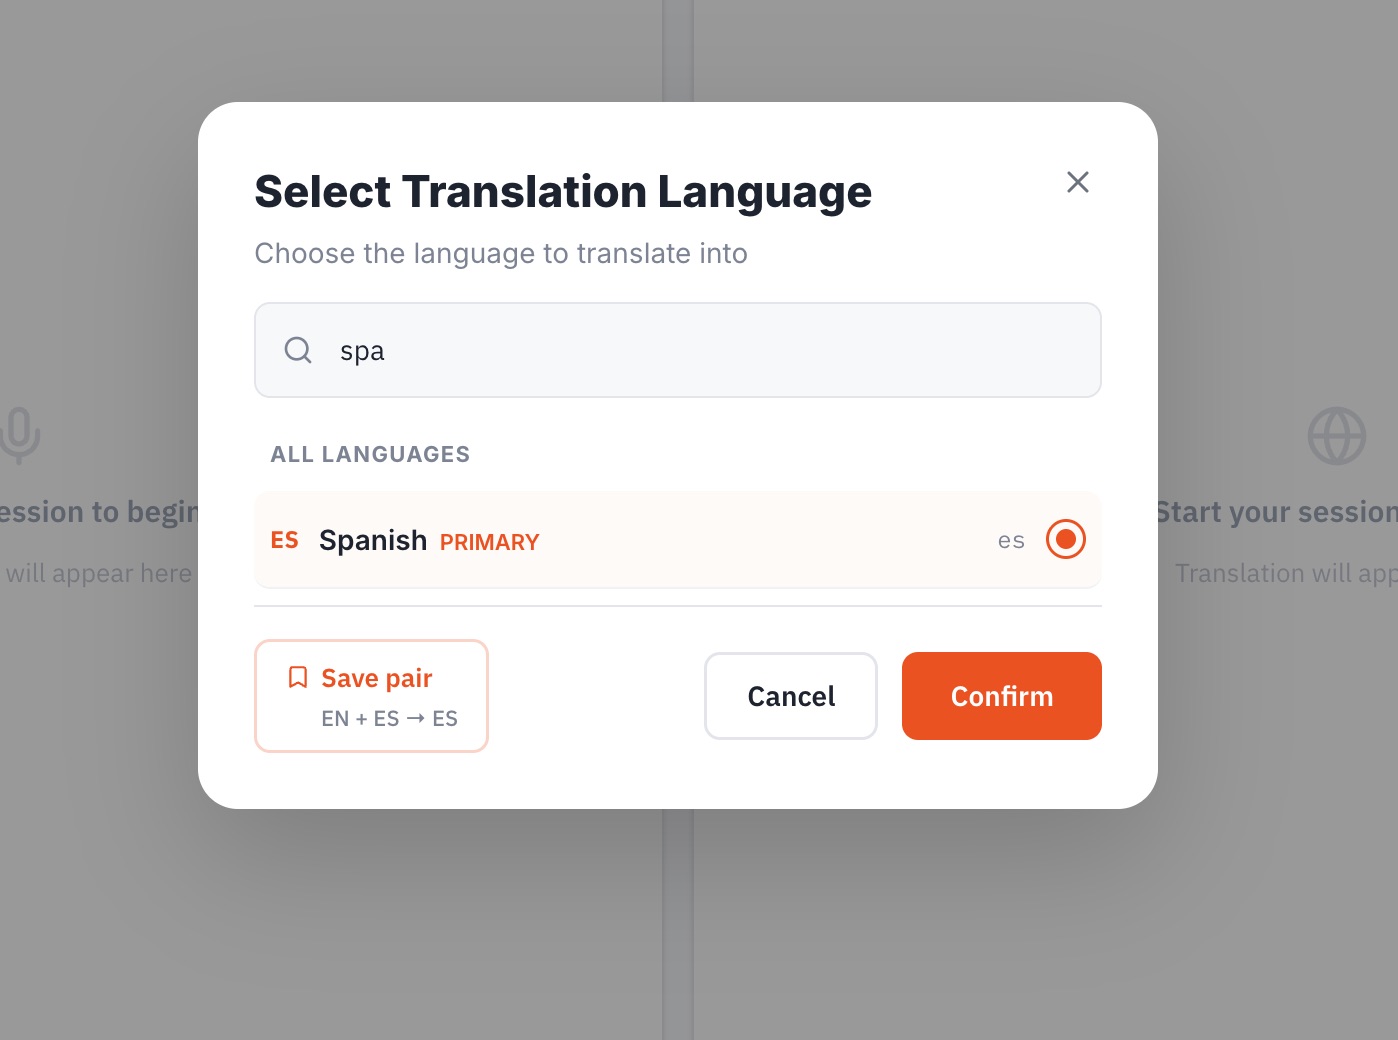
Once you are happy with the combination, click the Save pair button. Unicaption remembers it for every future session, so you never have to set it up again.
Configure once, forget it. Saving your pair means the next time you open Unicaption it is ready to go — no re-selecting languages before each call.
If you chose System or Both in Step 4, your browser needs to share the screen to capture computer audio. Unicaption only uses the audio, not the video. When you press Start, this dialog appears:
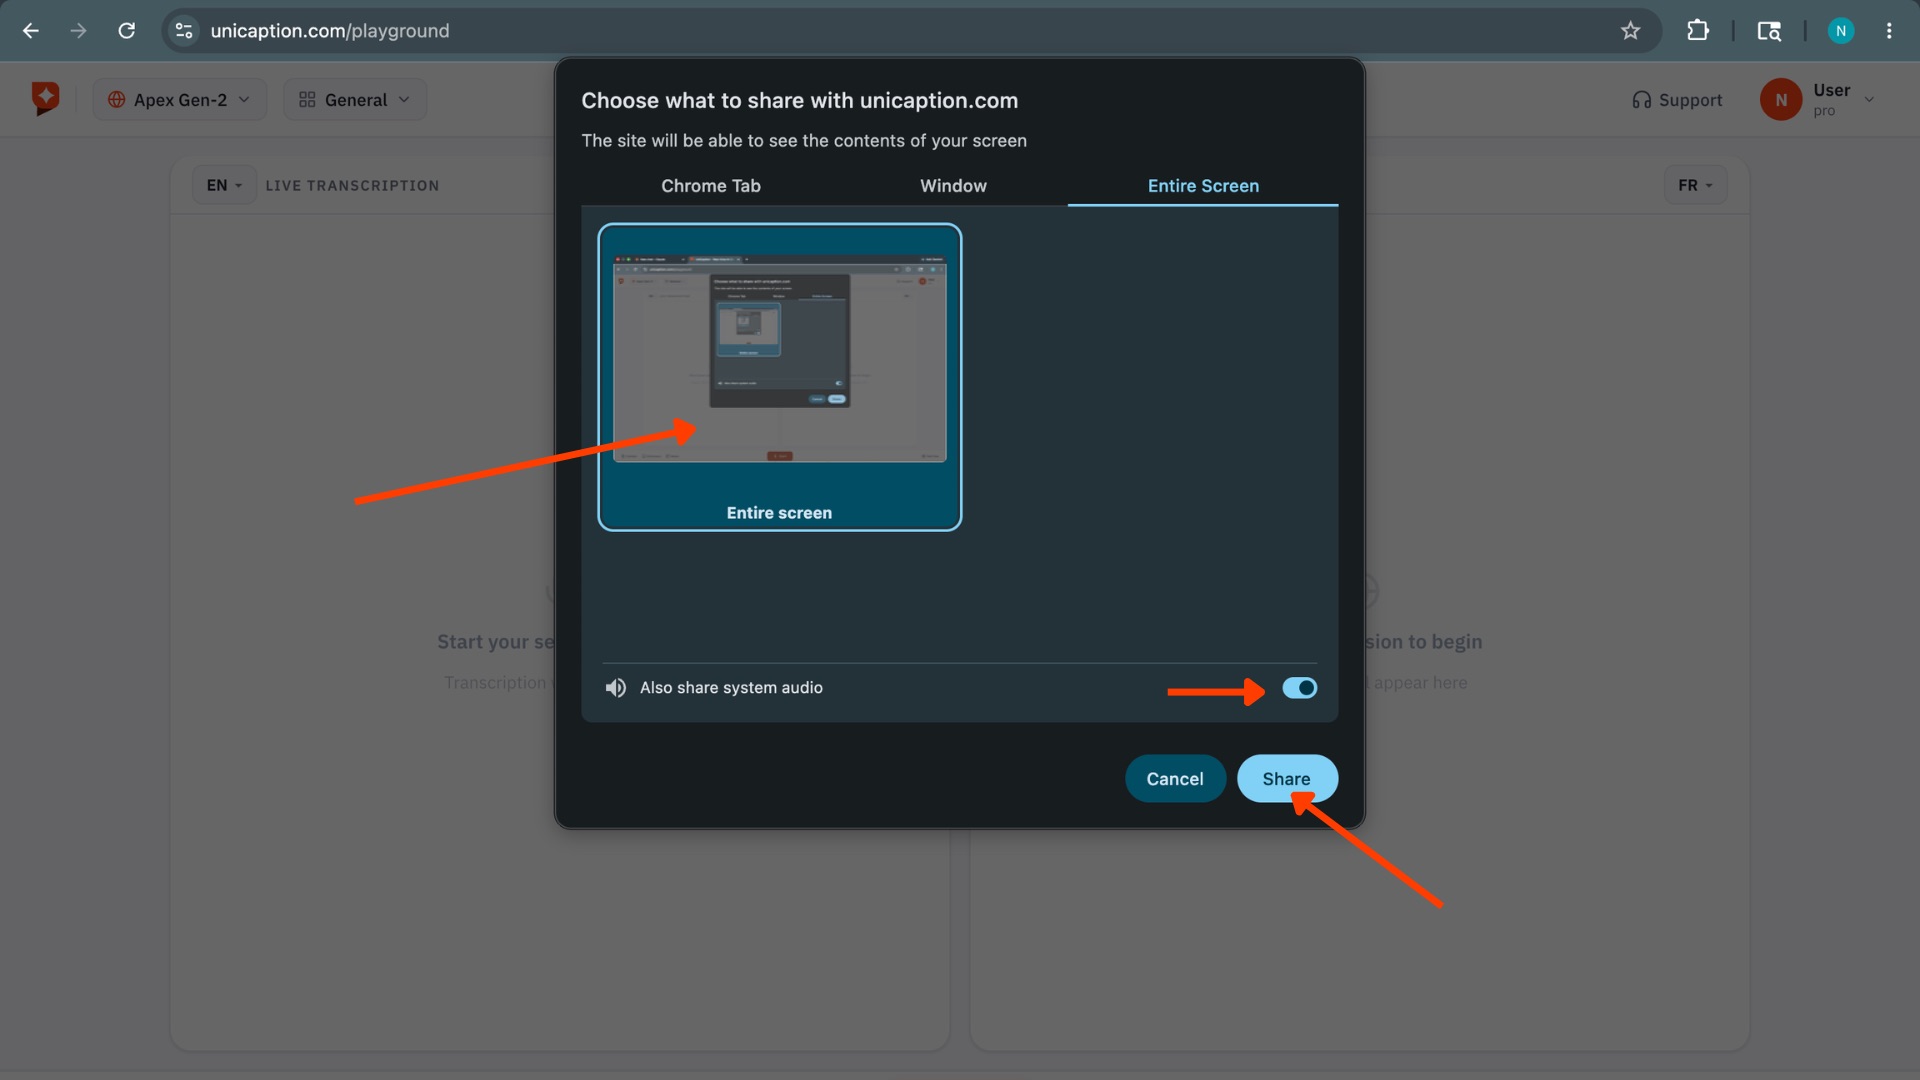
Three things, in order: pick the Entire Screen tab → click the preview to select it → turn on "Also share system audio" → then hit Share.
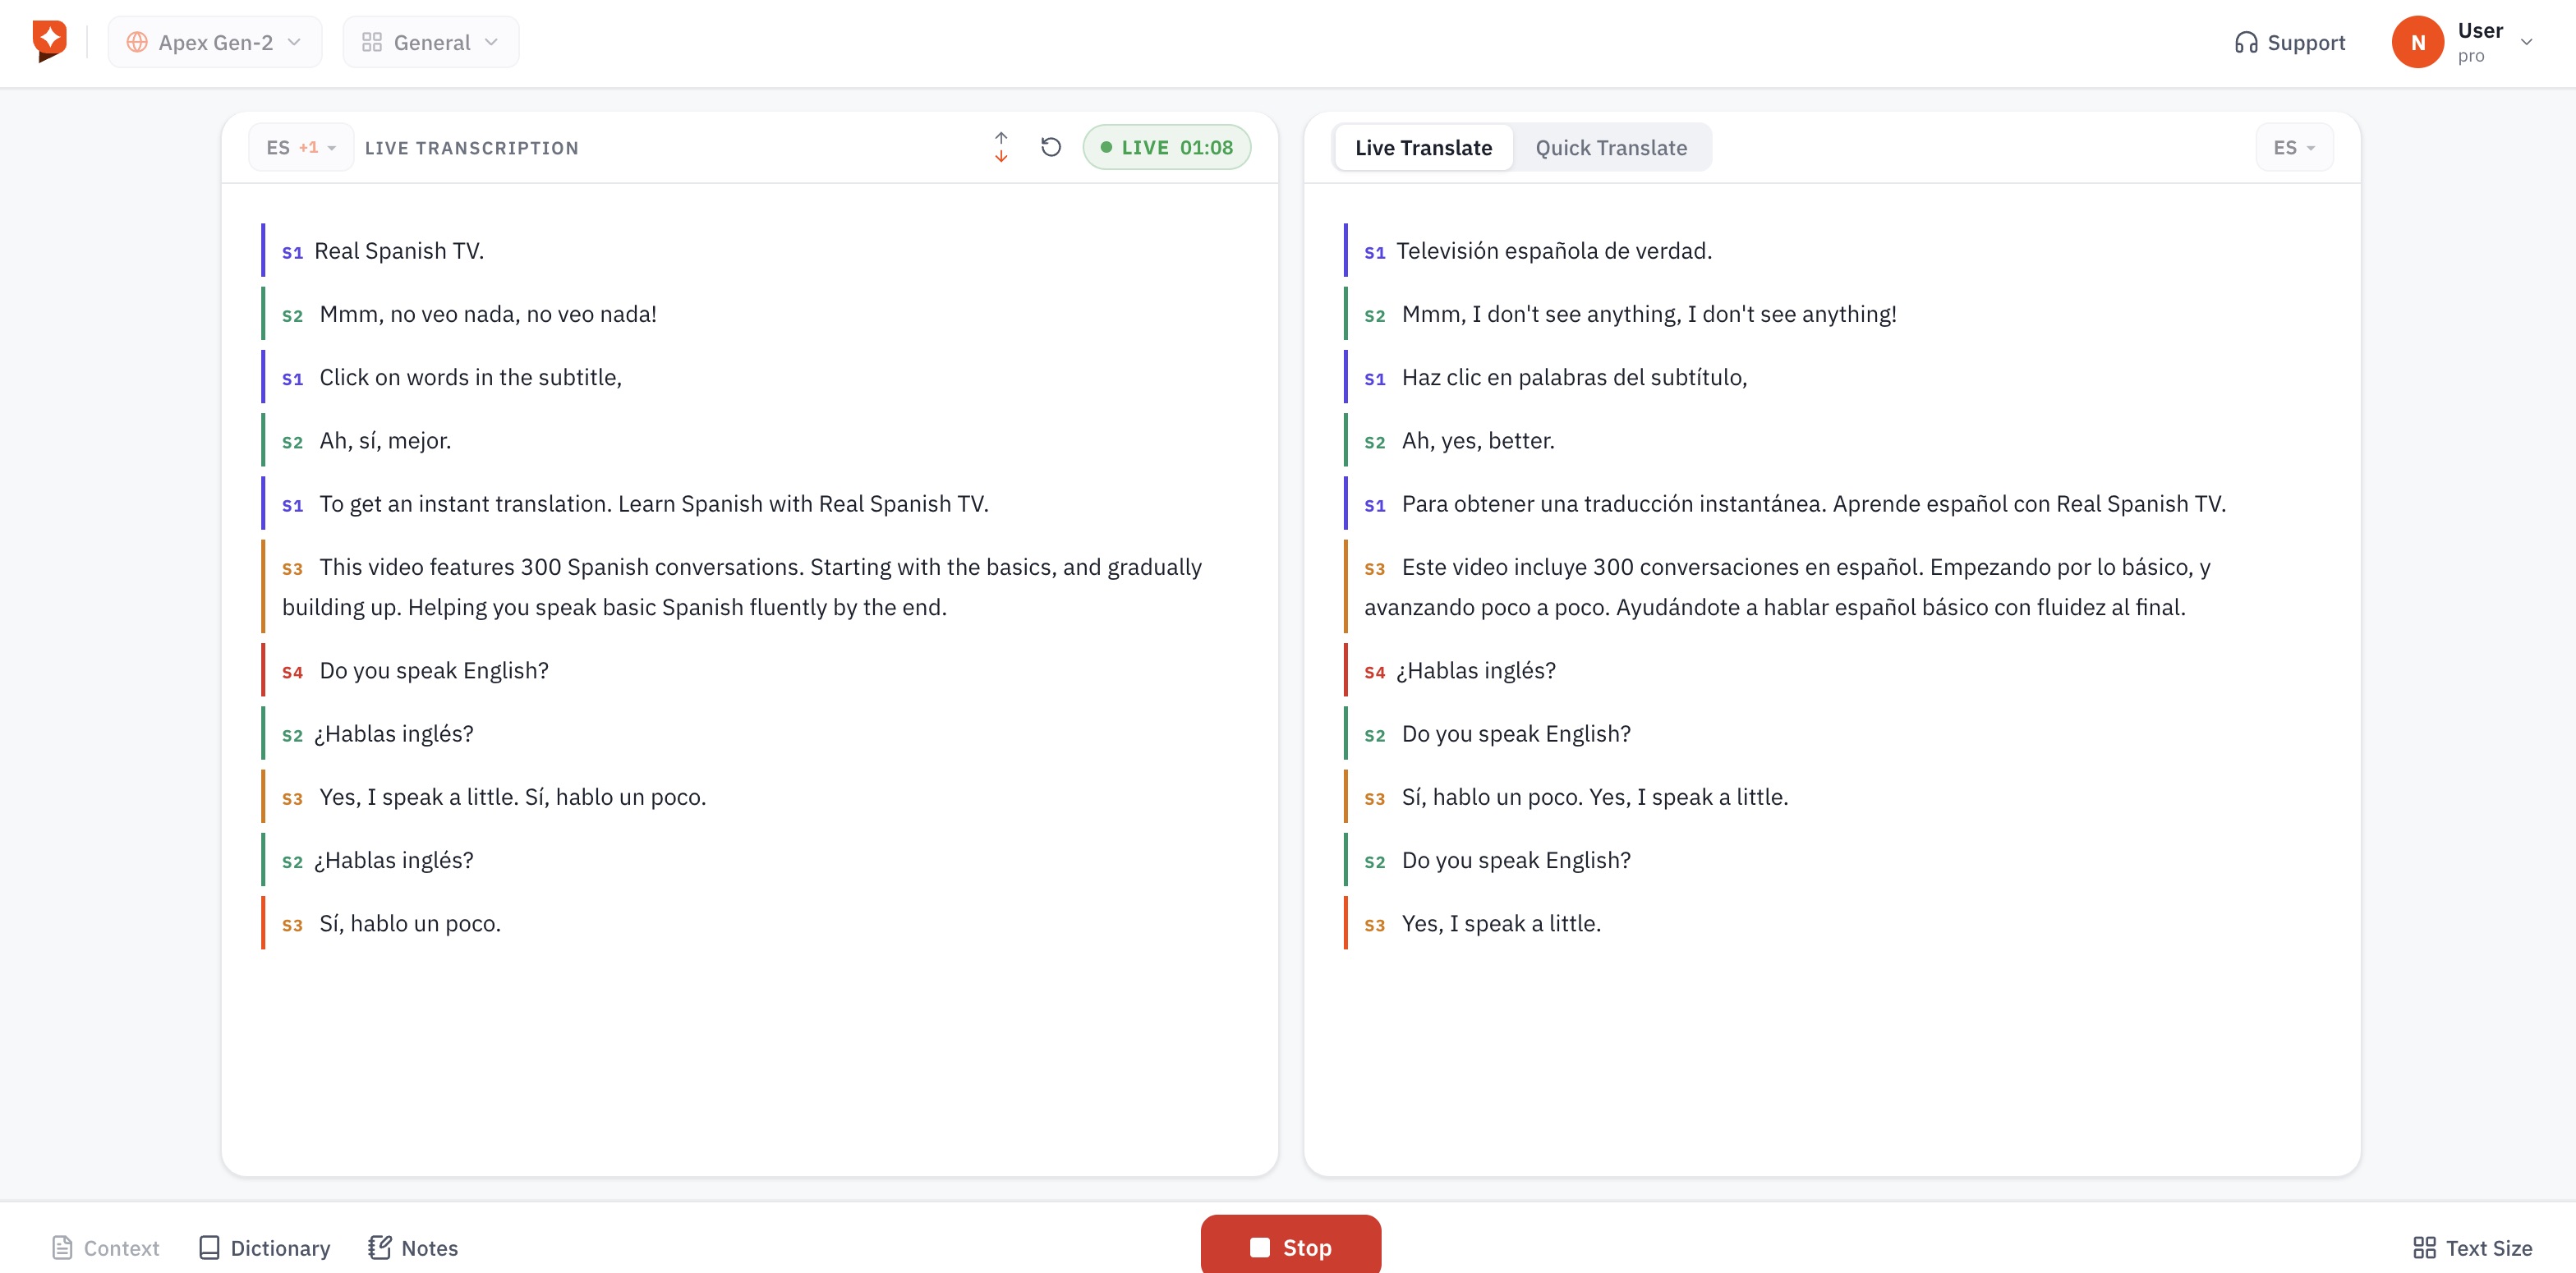
Hit the orange Start button. Captions appear in real time on the left, with the translation building alongside on the right — each line labeled by speaker.
A few more things to explore
Once you are running, these tools help you get the most out of each session.
Live vs Quick Translate
Toggle at the top of the translation panel — Live for continuous flow, Quick for the lowest latency.
Context
Give the session background — topic, speakers, meeting type — to sharpen accuracy on names and terms.
Dictionary
Add custom terminology, jargon, or proper nouns so they are transcribed exactly how you need them.
Notes
Jot session notes without leaving the Playground — handy for flagging moments to review later.
Text Size
Resize caption text for readability — useful on big monitors or when sharing your screen with a client.
Speaker labels
Each line is tagged by speaker (S1, S2…) so multi-party conversations stay easy to follow.
Watch it in action
Prefer to see it work? This short demo walks through a real session.
Next steps
Using Unicaption beside a meeting? Live translated captions in Zoom, Teams, and Google Meet walks through the setup per platform. Working medical calls? Start with HIPAA-compliant live captioning.
Ready to catch every word?
Set up in 30 seconds. 30 free minutes every week — no credit card.
Start Free Trial →